AI 如何找出你脸上的关键点?
在本文中,我们使用 face_recognition 库,它能在照片中找出人脸,以及每张脸上的关键点。
这个程序是官方示例的修改版本,原示例见此网页: find_facial_features_in_picture.py。
前后对比
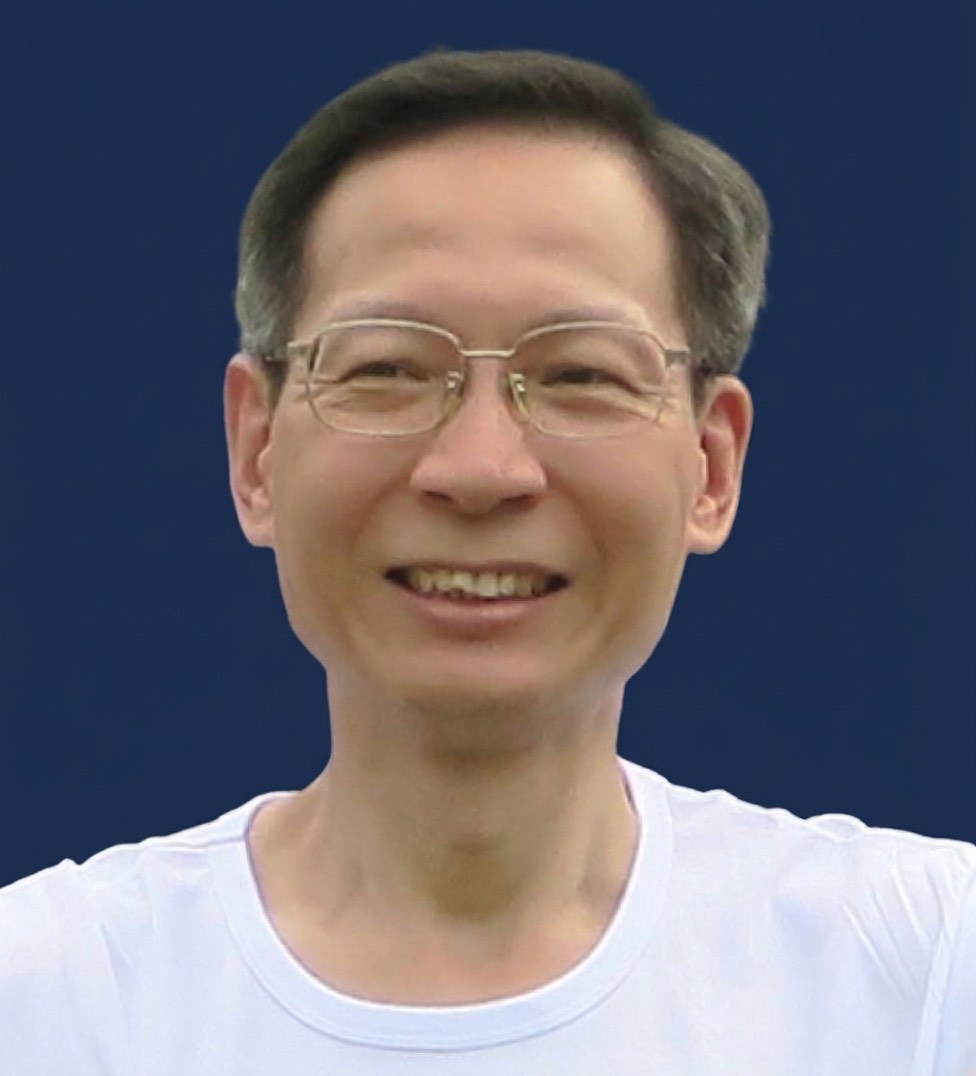
my_photo.jpg。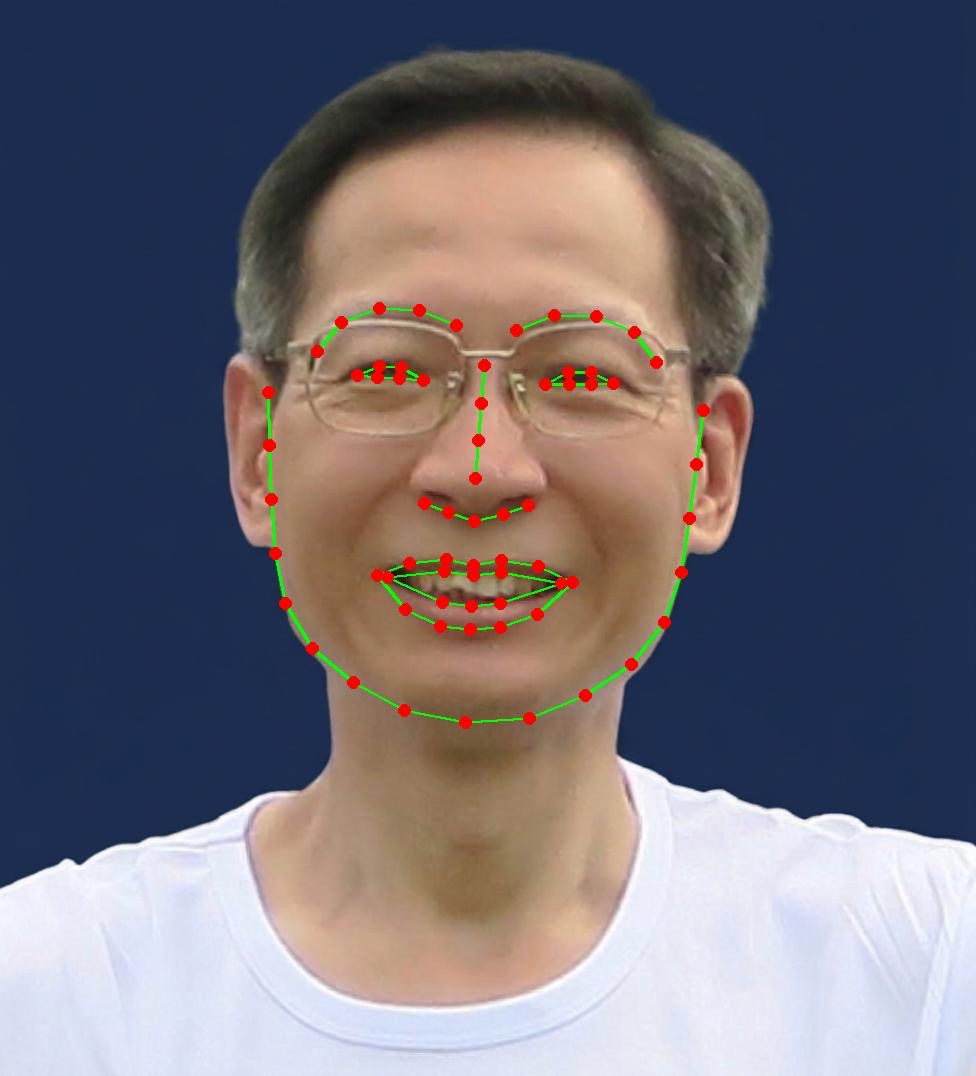
my_photo_landmarks.jpg。这 72 个点标出了什么
程序把关键点按面部部位分组。
- 下巴——17 个点,沿下颌画成一条开放的线。
- 眉毛——每侧 5 个点,画成开放的线。
- 鼻子——鼻梁 4 个点,鼻尖 5 个点。
- 眼睛——每侧 6 个点,首尾相连,闭合成形。
- 嘴唇——上唇 12 个点,下唇 12 个点,同样是闭合形状。
17 + 5 + 5 + 4 + 5 + 6 + 6 + 12 + 12 = 72。
程序如何运行
里面只有四个概念。下面每一段都是几行代码,后面跟着白话说明。
1. 加载照片并获取关键点
image = face_recognition.load_image_file("my_photo.jpg")
face_landmarks_list = face_recognition.face_landmarks(image)
pil_image = Image.fromarray(image)
第一行读取照片。第二行是真正的 AI 工作:它找出图中每一张脸,然后返回每张脸的关键点。 第三行把照片变成程序可以在上面画图的东西。
结果是一个列表,每张脸对应一个条目。我们的照片只有一张脸,所以列表只有一个条目。
2. 选择标记的大小和颜色
size = max(2, pil_image.width // 300)
color_line = (0, 255, 0)
color_point = (255, 0, 0)
在小照片上看起来合适的圆点,放到大照片上就会消失,所以大小要根据照片宽度计算。
// 是整数除法,会舍去小数:我们的照片宽 976 像素,976 // 300
等于 3。max(2, 3) 取两个数字中较大的,即 3,所以每个圆点和线条都是
3 像素粗。小照片的大小至少是 2,标记仍然看得见。
color_line 把线条颜色设为绿色:三个数字分别是红、绿、蓝的像素值,
(0, 255, 0) 表示无红、全绿、无蓝。color_point 把圆点颜色
设为红色,因为 (255, 0, 0) 表示全红、无绿、无蓝。
3. 连接每个面部部位的点
if facial_feature in ['left_eye', 'right_eye', 'top_lip', 'bottom_lip']:
    d.line(points + [points[0]], fill=color_line, width=size)
else:
    d.line(points, fill=color_line, width=size)
眼睛和嘴唇是闭合形状,所以程序把第一个点再加到列表末尾。这样线条就能绕一整圈, 不会留下缺口。下巴、眉毛和鼻子是开放的线,直接画即可。
4. 在每个点画上红色圆点
for x, y in points:
    d.ellipse([x - size * 2, y - size * 2, x + size * 2, y + size * 2], fill=color_point)
画圆需要一个外接方框:左、上、右、下。从该点向四方各延伸 6 像素,就得到直径 12 像素的圆点。循环对每个面部部位的每个点重复这个动作。
pil_image.save("my_photo_landmarks.jpg")最后,程序把带有标记的照片保存起来。那就是本文顶部展示的图片。
完整程序
把上面的四个部分拼回来。这就是完整的文件,一共 25 行:
# https://github.com/ageitgey/face_recognition
# https://github.com/ageitgey/face_recognition/blob/master/examples/find_facial_features_in_picture.py
from PIL import Image, ImageDraw
import face_recognition
image = face_recognition.load_image_file("my_photo.jpg")
face_landmarks_list = face_recognition.face_landmarks(image)
pil_image = Image.fromarray(image)
# Make the dots and lines bigger for bigger pictures
size = max(2, pil_image.width // 300)
color_line = (0, 255, 0)
color_point = (255, 0, 0)
for face_landmarks in face_landmarks_list:
    d = ImageDraw.Draw(pil_image)
    # Each face part is a list of key points, e.g. 'chin' has 17 points
    for facial_feature, points in face_landmarks.items():
        print(facial_feature, len(points), "points")
        # Eyes and lips are closed shapes, so join the last point back to the first
        if facial_feature in ['left_eye', 'right_eye', 'top_lip', 'bottom_lip']:
            d.line(points + [points[0]], fill=color_line, width=size)
        else:
            d.line(points, fill=color_line, width=size)
        # Draw a dot on every key point
        for x, y in points:
            d.ellipse([x - size * 2, y - size * 2, x + size * 2, y + size * 2], fill=color_point)
    pil_image.save("my_photo_landmarks.jpg")
在自己的电脑上运行
下载 zip 文件并解压到
一个文件夹。这个 zip 包含本系列的六个程序;本文使用
face01_landmarks.py。把你自己的照片放进该文件夹,命名为
my_photo.jpg。在 Visual Studio Code 中打开文件夹,然后在终端输入
以下三行:
uv python pin 3.12.10
uv sync
uv run face01_landmarks.py
第一行记录这个文件夹使用的 Python 版本。第二行安装 pyproject.toml
列出的所有软件包,你不用逐一安装。第三行运行程序,它会把带标记的照片保存为
my_photo_landmarks.jpg。
如果你还没有设置 uv,请先阅读 〈如何安装 Visual Studio Code?〉, 然后是 Windows 或 Mac 的 uv 笔记。
技术备注:face-recognition 软件包依赖另一个名为 dlib 的软件包。
zip 中的项目文件已指向预先编译好的 dlib 版本,所以 uv sync
会直接安装可用版本,你不需要安装编译器。
这有什么用
找出关键点,是任何需要对脸部特定部位操作的应用的第一步:涂口红、改变眉毛颜色等等。 有趣的是,AI 负责“找”,而颜色、粗细和风格的选择权仍然在你手上。这是一种有用的 分工:机器回答“嘴唇在哪里?”,而你决定嘴唇应该是什么样子。