How to use AI to change your eyebrows?
In this note, we use the face_recognition library again. It finds the five points that outline each eyebrow, and the program fills that area with a half see-through dark brown. The whole program is 12 lines.
If you have not read How does AI find the key points on your face?, start there. That note explains how the library finds the points; this note uses the same points to paint a colour over them.
Before and after
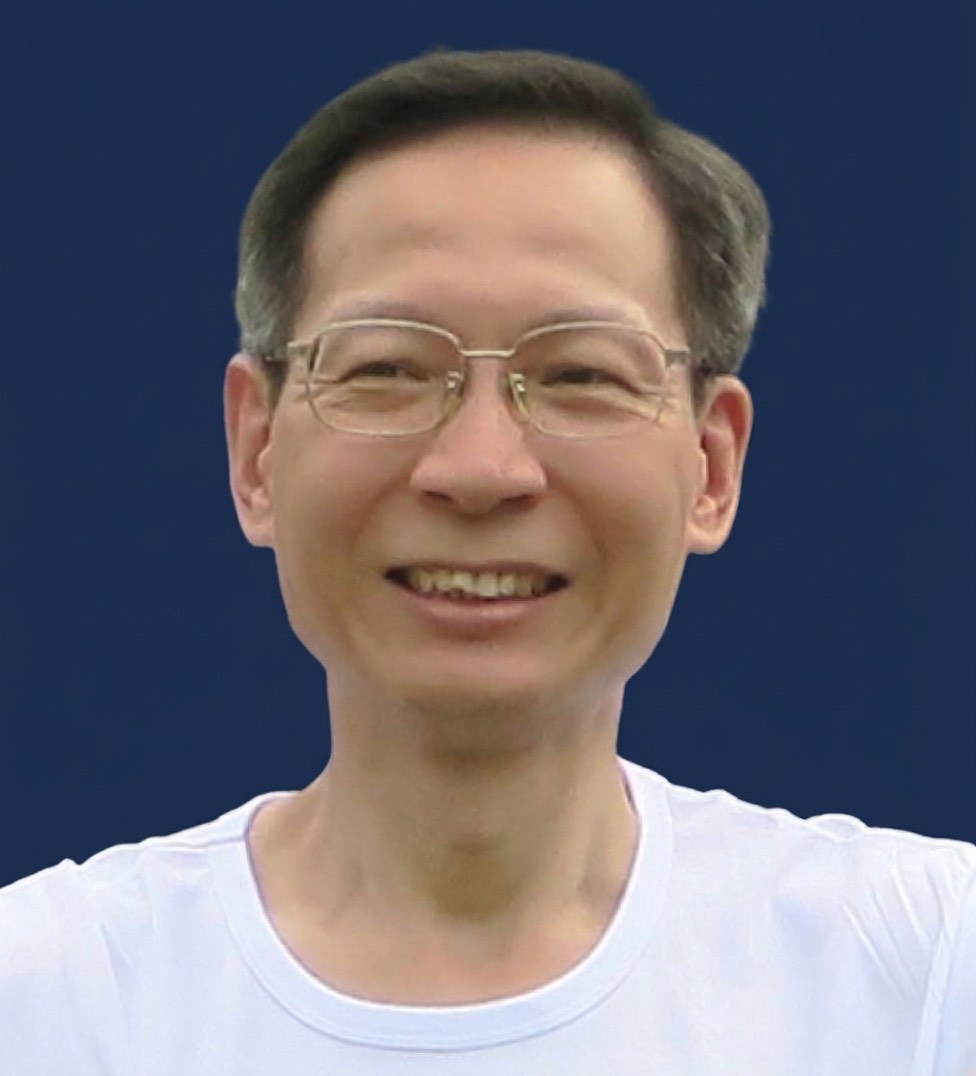
my_photo.jpg.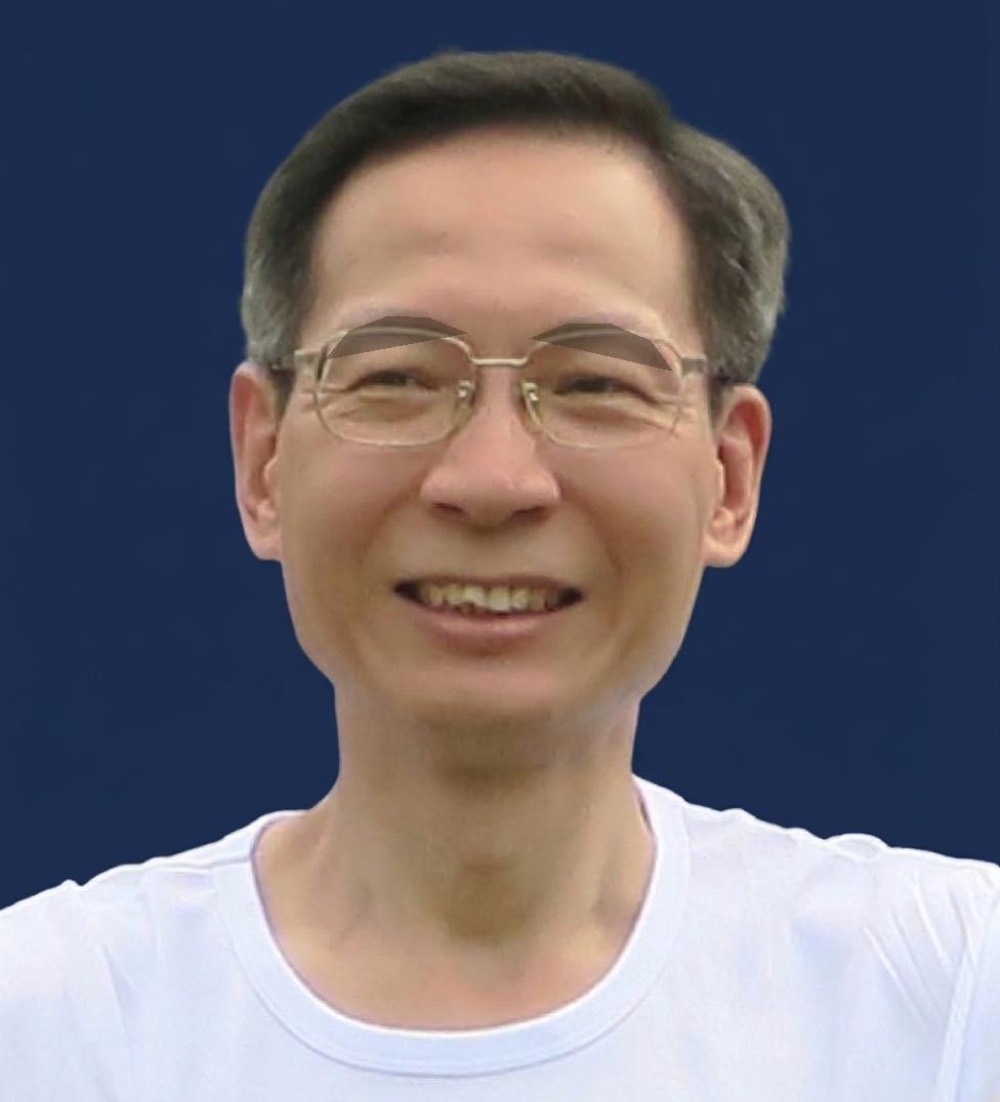
my_photo_eyebrow.jpg. The colour is see-through, so your own eyebrows still show.How the program works
The first five lines are the same as in the previous note: read the photo, find the points, and turn the photo into something the program can draw on. After that there are only three new ideas.
1. Make the drawing see-through
for face_landmarks in face_landmarks_list:
    d = ImageDraw.Draw(pil_image, 'RGBA')
The loop takes one face at a time, and everything indented under it runs once for that face. Our photo has one face, so it runs once.
The second line makes a drawing tool called d. RGBA stands for red,
green, blue and alpha, and alpha is how see-through a colour is. With 'RGBA', a
colour is mixed with the pixels underneath instead of covering them.
2. Choose the eyebrow colour
# (red, green, blue, see-through): each 0 to 255; see-through 0 = invisible, 255 = solid
color_eyebrow = (68, 54, 39, 128)
Four numbers, not three. The first three are the amounts of red, green and blue, all low, so the colour is dark; red is the highest of the three, which makes it a dark brown. The fourth number, 128, is about half of 255, so the colour is half see-through and your own eyebrows still show through it.
3. Fill both eyebrows
d.polygon(face_landmarks['left_eyebrow'], fill=color_eyebrow)
d.polygon(face_landmarks['right_eyebrow'], fill=color_eyebrow)
Each eyebrow is outlined by five points. polygon joins the points in order, goes
straight back from the last point to the first, and fills the area inside.
pil_image.save("my_photo_eyebrow.jpg")Finally the program saves the photo with the brown eyebrows, under a new name, so the original stays untouched.
The whole program
The pieces above, put back together. This is the complete file, 12 lines in all:
from PIL import Image, ImageDraw
import face_recognition
image = face_recognition.load_image_file("my_photo.jpg")
face_landmarks_list = face_recognition.face_landmarks(image)
pil_image = Image.fromarray(image)
for face_landmarks in face_landmarks_list:
    d = ImageDraw.Draw(pil_image, 'RGBA')
    # (red, green, blue, see-through): each 0 to 255; see-through 0 = invisible, 255 = solid
    color_eyebrow = (68, 54, 39, 128)
    d.polygon(face_landmarks['left_eyebrow'], fill=color_eyebrow)
    d.polygon(face_landmarks['right_eyebrow'], fill=color_eyebrow)
    pil_image.save("my_photo_eyebrow.jpg")
Running it on your own computer
Download the zip file and unzip it to
a folder. The zip holds all six programs in this series; this note uses
face02_eyebrow.py. Add your own photo to that folder and name it
my_photo.jpg. Open the folder in Visual Studio Code, then type these three lines in
the terminal:
uv python pin 3.12.10
uv sync
uv run face02_eyebrow.py
The first line records which Python version this folder uses. The second line installs every
package that pyproject.toml lists, so you do not have to add them one by one. The
third line runs the program, which saves the result as my_photo_eyebrow.jpg.
If you have not set up uv yet, start with How to install Visual Studio Code? and then the uv note for Windows or Mac.
Technical note: the face-recognition package depends on another package called
dlib. The project file in the zip already points to a prebuilt version of
dlib, so uv sync installs it ready to use and you do not need to
install a compiler.
What this is good for
This is the shape of every digital try-before-you-buy tool. The program knows where your eyebrows are, and the colour is a value you can change in one line — so you can see a shade before you buy it, or compare two browns side by side.
Two limits are worth knowing. The program changes colour only, not shape: a real eyebrow pencil also adds length and thickness. And because it fills the area the five points enclose, the colour sits mainly above the brow line; a denser fill would need more points or a little geometry.